750,000+ kits de retouche vendus dans le monde
DHLUPSFedEx

Réparation professionnelle · à la maison

Comment appliquer votre peinture de retouche

Merci d'avoir choisi Color N Drive — un mélange sur mesure qui permet à chacun d'obtenir une réparation d'aspect professionnel sur sa VAUXHALL à la maison, avec un séchage rapide et une teinte d'origine parfaite. Suivez les quatre étapes ci-dessous.

Retouchez en 4 étapes

01

Nettoyer

Préparez l'éclat avec Correct'N'Clear. La surface doit être propre et sèche.

02

Retoucher

Appliquez votre peinture en teinte exacte dans le dommage, en couches fines.

03

Racler

Faites glisser la carte à plat pour retirer l'excédent — la peinture reste dans la rayure.

04

Finir

Essuyez l'excédent restant avec Correct'N'Clear, puis lustrez pour fondre la retouche.

Guide d'utilisation · 11 langues

Le guide complet, dans votre langue

Choisissez votre langue pour lire le guide complet étape par étape, ou téléchargez le PDF imprimable à conserver avec votre kit.

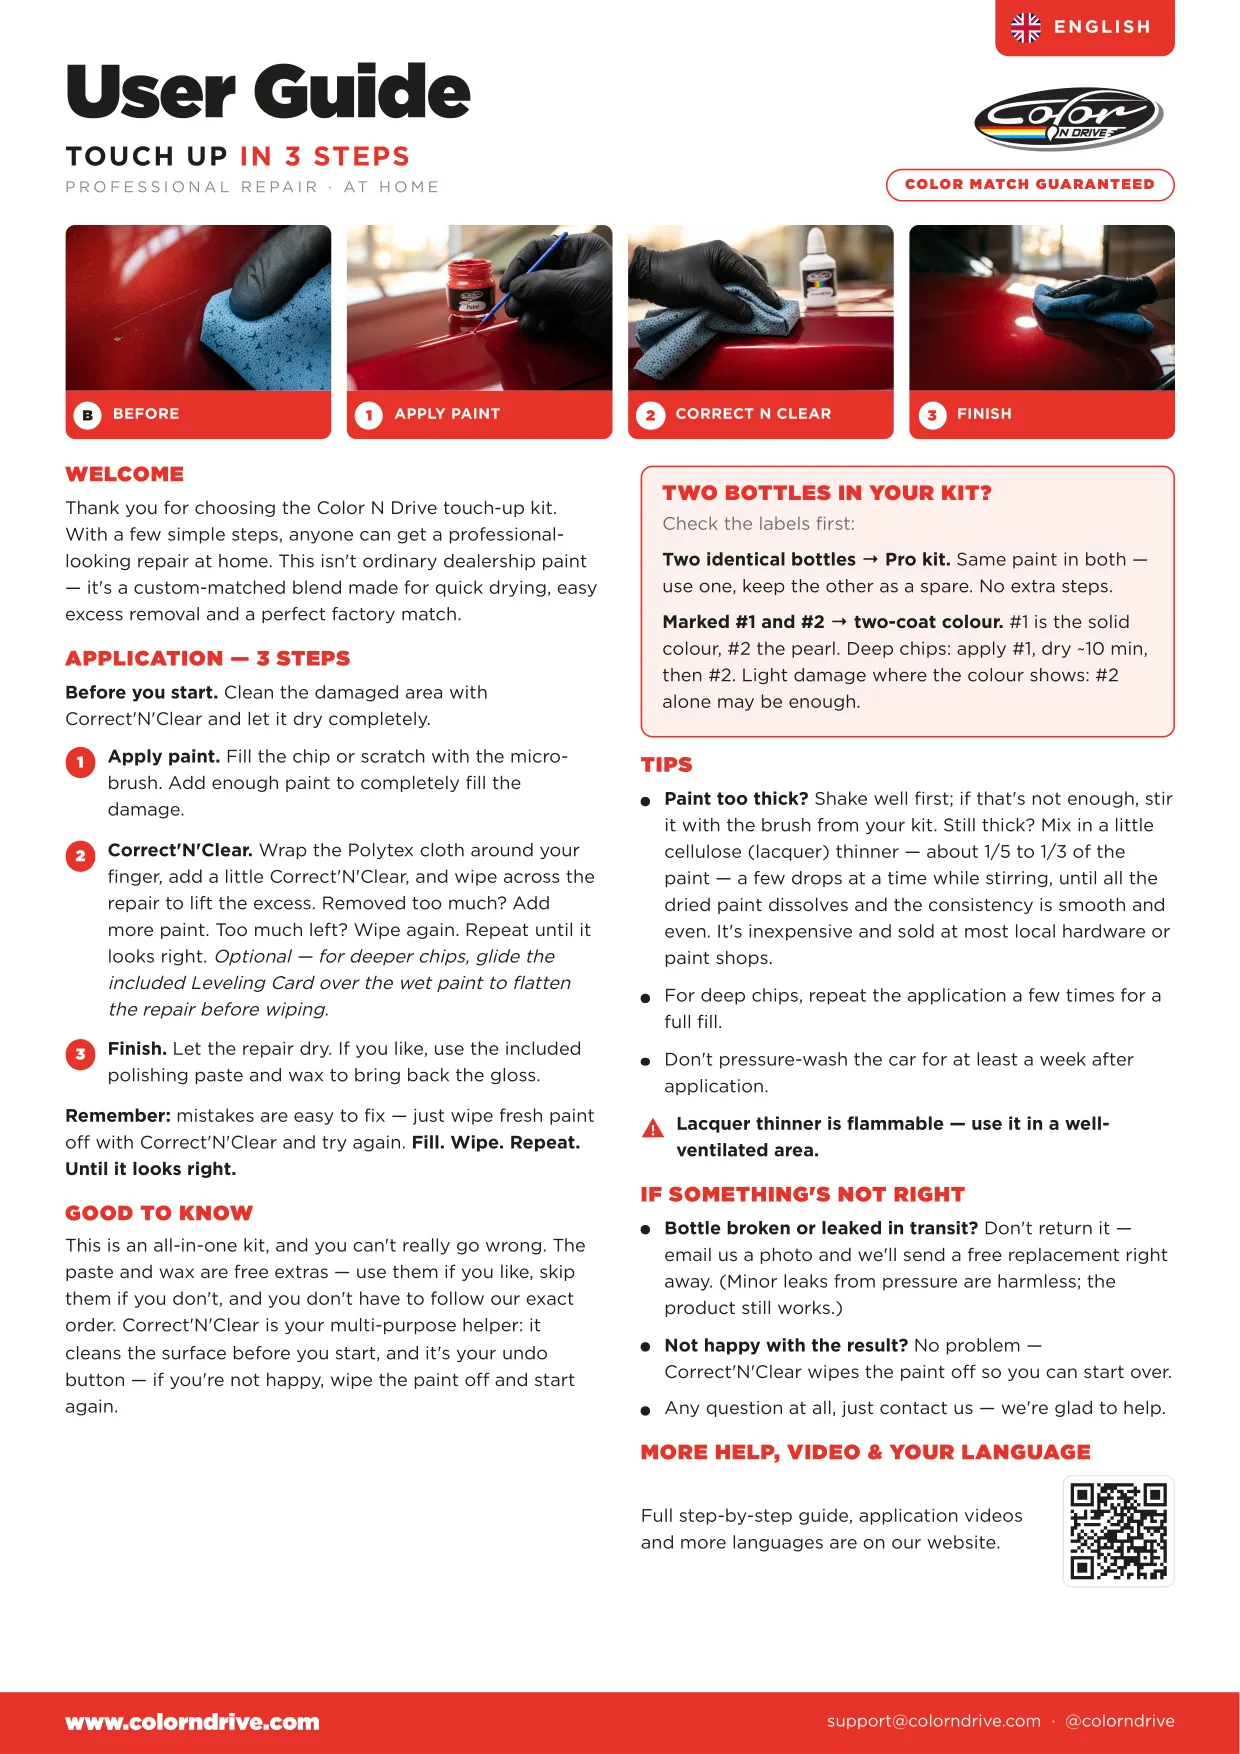
WELCOME

Thank you for choosing the Color N Drive touch-up kit. With a few simple steps, anyone can get a professionallooking repair at home. This isn't ordinary dealership paint — it's a custom-matched blend made for quick drying, easy excess removal and a perfect factory match.

APPLICATION — 3 STEPS

Before you start. Clean the damaged area with Correct'N'Clear and let it dry completely.

Apply paint. Fill the chip or scratch with the microbrush. Add enough paint to completely fill the damage. Correct'N'Clear. Wrap the Polytex cloth around your finger, add a little Correct'N'Clear, and wipe across the repair to lift the excess. Removed too much? Add more paint. Too much left? Wipe again. Repeat until it looks right. Optional — for deeper chips, glide the included Leveling Card over the wet paint to flatten the repair before wiping. Finish. Let the repair dry. If you like, use the included polishing paste and wax to bring back the gloss.

Remember: mistakes are easy to fix — just wipe fresh paint off with Correct'N'Clear and try again. Fill. Wipe. Repeat. Until it looks right.

TWO BOTTLES IN YOUR KIT?

Check the labels first: Two identical bottles → Pro kit. Same paint in both — use one, keep the other as a spare. No extra steps. Marked #1 and #2 → two-coat colour. #1 is the solid colour, #2 the pearl. Deep chips: apply #1, dry ~10 min, then #2. Light damage where the colour shows: #2 alone may be enough.

TIPS

Paint too thick? Shake well first; if that's not enough, stir it with the brush from your kit. Still thick? Mix in a little cellulose (lacquer) thinner — about 1/5 to 1/3 of the paint — a few drops at a time while stirring, until all the dried paint dissolves and the consistency is smooth and even. It's inexpensive and sold at most local hardware or paint shops. For deep chips, repeat the application a few times for a full fill. Don't pressure-wash the car for at least a week after application. Lacquer thinner is flammable — use it in a wellventilated area.

IF SOMETHING'S NOT RIGHT

GOOD TO KNOW

This is an all-in-one kit, and you can't really go wrong. The paste and wax are free extras — use them if you like, skip them if you don't, and you don't have to follow our exact order. Correct'N'Clear is your multi-purpose helper: it cleans the surface before you start, and it's your undo button — if you're not happy, wipe the paint off and start again.

Bottle broken or leaked in transit? Don't return it — email us a photo and we'll send a free replacement right away. (Minor leaks from pressure are harmless; the product still works.) Not happy with the result? No problem — Correct'N'Clear wipes the paint off so you can start over. Any question at all, just contact us — we're glad to help.

MORE HELP, VIDEO & YOUR LANGUAGE

Full step-by-step guide, application videos and more languages are on our website.

Vidéo d'application

Regarder la vidéo d'application complète

Découvrez précisément comment les étapes de nettoyage, d'application, de raclage et de finition s'enchaînent pour un résultat lisse et en teinte d'origine — du début à la fin en quelques minutes.

Correct'N'Clear — votre filet de sécurité

Sauf si votre voiture est neuve, la couleur peut ne pas correspondre parfaitement au début — la peinture d'origine se ternit avec le temps. Appliquez la peinture en couches jusqu'à obtenir la bonne teinte ; Correct'N'Clear retire la retouche en toute sécurité à tout moment, pour que vous puissiez travailler en confiance et sans risque.

Étapes d'application

  1. 1

    Nettoyer

    Retirez toute la saleté, la cire et le lustrant avec Correct'N'Clear, puis laissez sécher.

  2. 2

    Appliquer

    Avec la micro-brosse, déposez la peinture dans l'éclat en couches fines — montez progressivement, ne noyez pas la zone.

  3. 3

    Racler et niveler

    Tant que c'est humide, faites glisser la carte Color N Drive à plat comme une spatule pour lever l'excédent ; la peinture reste tassée dans la rayure. Pas de carte ? Une carte de visite rigide fait l'affaire.

  4. 4

    Essuyer

    Une fois sec, passez un peu de Correct'N'Clear sur la zone avec le chiffon. N'appuyez pas fort — laissez la solution agir. Répétez jusqu'à ce qu'il ne reste que la rayure comblée.

Finition cosmétique (facultatif)

Pâte
Sans abrasif ; adoucit la transition de couleur autour de la retouche.
Cire
Lustrez tout le panneau pour une brillance la plus uniforme et régulière possible.

Conseils

  • Secouez bien le flacon avant chaque utilisation pour éviter les paquets.
  • Éclats profonds : répétez l'application plusieurs fois pour un remplissage complet.
  • Panneau fraîchement repeint ? Laissez-le durcir environ 1 mois d'abord.
  • Pas de nettoyage haute pression pendant au moins 1 semaine après l'application.

Deux flacons identiques → kit Pro

La même peinture dans les deux — utilisez-en un, gardez l'autre en réserve. Aucune étape supplémentaire.

Marqués n°1 et n°2 → couleur en deux couches

Le n°1 est la couleur unie, le n°2 le nacré. Éclats profonds : appliquez le n°1, laissez sécher environ 10 min, puis le n°2. Dommages légers où la couleur reste visible : le n°2 seul peut suffire.

Vous avez encore une question sur l'application de votre peinture ?